
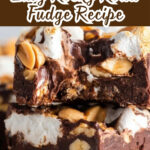
If you’re on the hunt for a dessert that’s rich, indulgent, and packed with texture, you’re going to absolutely love this Rocky Road Fudge Recipe. This fudge brings together silky chocolate, gooey marshmallows, and crunchy peanuts in a way that feels like one big cozy hug for your taste buds. I’ve made this recipe countless times for friends and family, and every single time, it disappears faster than you can say “pass the fudge!” So, stick around—I’m about to share the exact steps and tips that’ll help you make your own irresistible Rocky Road fudge without a hitch.

Why You’ll Love This Recipe
- Simple & Quick: You won’t believe how just 10 minutes of prep turns into a luscious dessert that feels special and decadent.
- Perfect Texture Combo: The mix of melted chocolate, chewy marshmallows, and crunchy peanuts creates the ultimate Rocky Road experience.
- Super Customizable: Whether you like it nutty, extra gooey, or with a caramel twist, this recipe lets you play and make it your own.
- Great for Gifting: Wrapped up nicely, this fudge makes a thoughtful homemade gift that feels extra special to whoever you share it with.
Ingredients & Why They Work
The magic of this Rocky Road fudge recipe comes down to the harmony of simple ingredients that deliver rich flavor and fun texture without fuss. Choosing good-quality chocolate chips and keeping the marshmallows cool ensures the best gooey versus firm bite balance. Let me walk you through why each part is key.
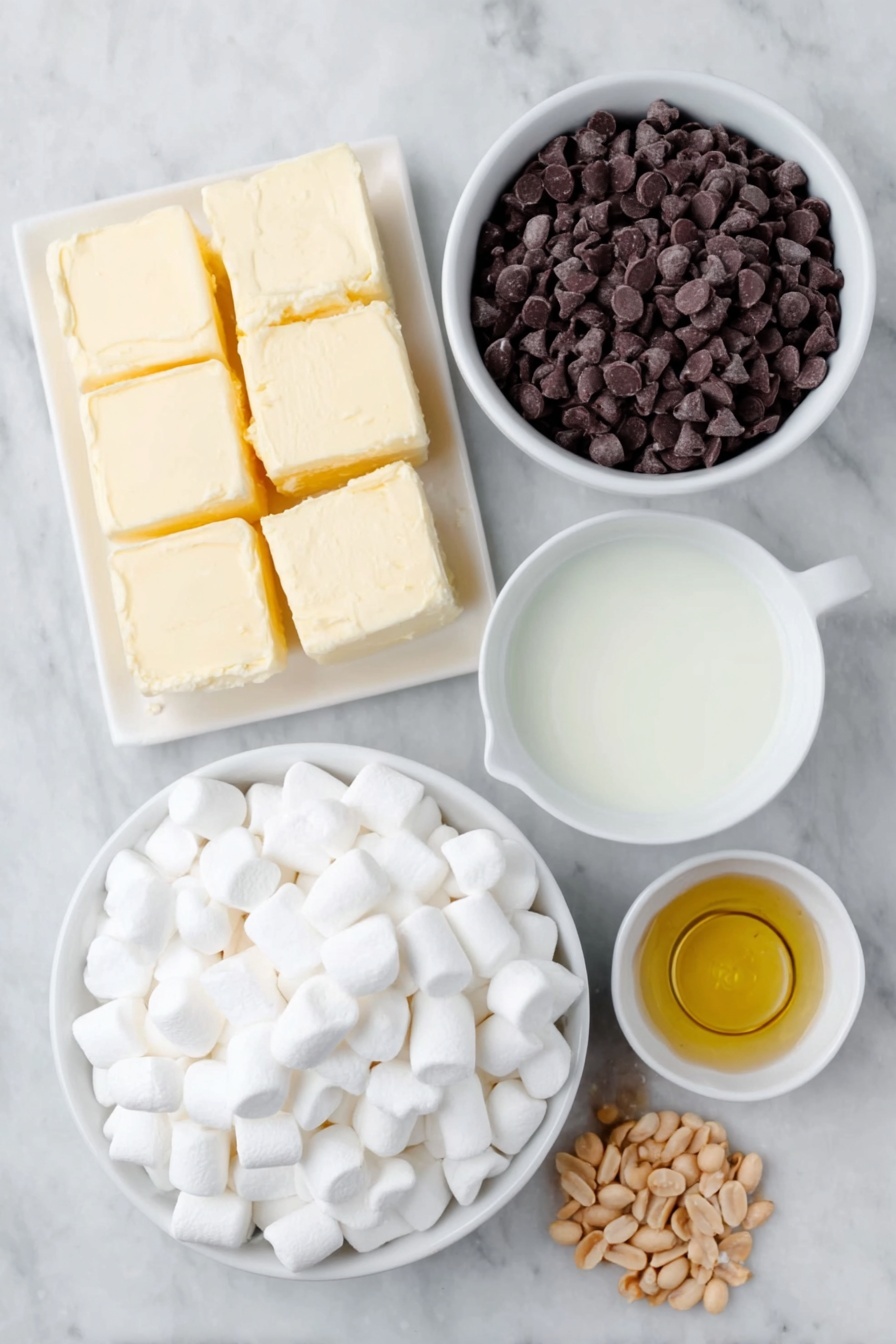
- Semi-sweet chocolate chips: I prefer these because they’re sweet but not overpowering, offering that classic fudge chocolate flavor without bitterness.
- Sweetened condensed milk: This ingredient gives the fudge its creamy, melt-in-your-mouth texture—no substitutes here.
- Butter: Using cold, cubed butter helps the chocolate melt evenly without burning or seizing—trust me, it’s a game changer.
- Vanilla extract: Just a teaspoon adds warmth and richness that lifts all the chocolate flavors beautifully.
- Mini marshmallows: Frozen mini marshmallows work best to keep their shape when folded into the warm fudge mixture, giving you lovely pockets of gooey softness.
- Salted peanuts: They balance the sweetness and introduce a satisfying crunch that completes the Rocky Road experience.
Make It Your Way
One of my favorite things about this Rocky Road fudge recipe is how easy it is to adapt. You can swap out peanuts for your favorite nuts, add dried fruit, or even drizzle caramel on top to elevate. Here are a few variations I’ve played with that you might want to try too.
- Nut-Free Version: I’ve made this with sunflower seeds and it was just as delightful—great for sharing with kids or anyone with nut allergies.
- Extra Gooey: For a softer fudge, mix in some marshmallow fluff; it gives the fudge a melty, pillowy center that’s downright addictive.
- Chocolate Mix: I often combine semi-sweet with dark or milk chocolate chips to tweak the sweetness to my liking.
- Caramel Drizzle: Adding a caramel drizzle right before chilling turns this into something truly special—perfect for gift boxes or celebrations.
Step-by-Step: How I Make Rocky Road Fudge Recipe
Step 1: Prep Your Pan and Gather Ingredients
First things first, line your 9×13-inch pan with foil and spray it with nonstick spray. This simple step will save you the headache of trying to get the fudge out later—it practically lifts right out. Also, get all your ingredients measured and ready to go; this fudge comes together quickly, so you want to be organized.
Step 2: Melt the Chocolate Mixture Gently
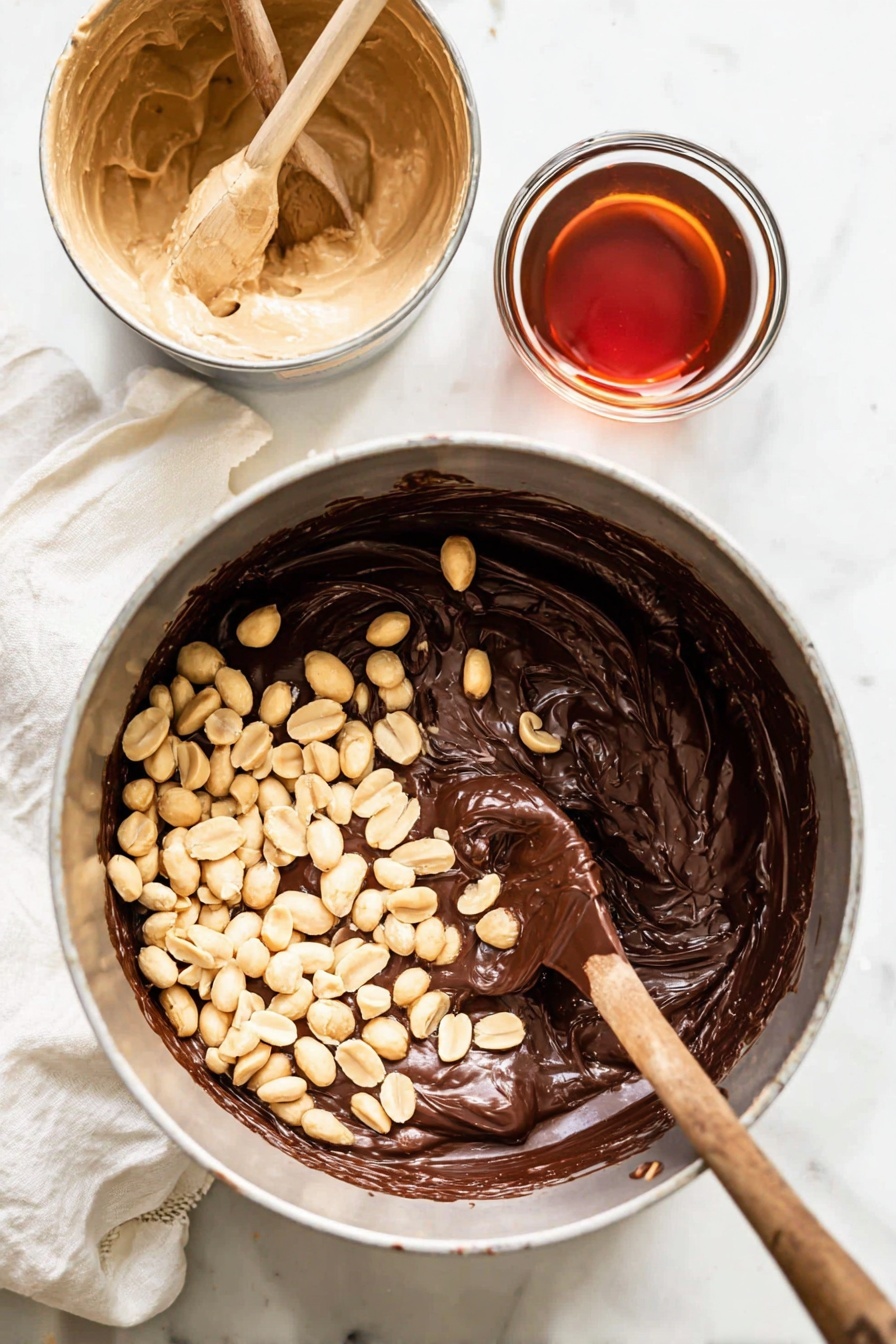
In a medium saucepan over medium heat, stir together semi-sweet chocolate chips, sweetened condensed milk, and cubed butter. Keep stirring constantly to prevent burning. You’re aiming for smooth, glossy melted chocolate—this usually takes about 5 minutes. Don’t rush this step! The butter helps the chocolate melt smoothly, so don’t swap it out or skip it.
Step 3: Stir in Peanuts and Vanilla, Then Pour Over Marshmallows
Once melted, take the saucepan off the heat and stir in the salted peanuts along with the vanilla extract. Meanwhile, place frozen mini marshmallows in a large mixing bowl. Pour the warm chocolate mixture over the marshmallows and gently fold to combine. If you want your marshmallows to stay more intact and not melt into the fudge, wait a few minutes for the chocolate to cool slightly before mixing.
Step 4: Spread and Top Before Chilling
Spread the fudge mixture evenly into your prepared pan. For a classic Rocky Road look, sprinkle a few extra marshmallows and peanuts on top. Press them lightly into the surface so they stick. Pop the pan into the fridge for at least 2-3 hours—or if you can resist, overnight—until the fudge is completely firm.
Pro Tips for Making Rocky Road Fudge Recipe
- Use Frozen Marshmallows: Freezing them before means they won’t melt too much and gives you distinct marshmallow bites in the fudge.
- Warm Knife for Clean Cuts: Dip your knife in hot water, wipe it dry, and use it to slice the fudge cleanly without crumbling.
- Don’t Rush Melting: Stir constantly and melt gently over medium heat—this prevents grainy or burnt chocolate.
- Foil-Lined Pan for Easy Removal: Lining the pan with foil means you can lift the entire fudge slab out when ready, making cutting and cleanup a breeze.
How to Serve Rocky Road Fudge Recipe
Garnishes
I always finish off my fudge with a scatter of extra mini marshmallows and salted peanuts on top—it adds a little rustic charm and signals all the yummy layers waiting inside. Sometimes, if I’m feeling fancy, I lightly drizzle caramel or a touch of sea salt to amp up the flavor contrast.
Side Dishes
This fudge is rich enough to be a standalone treat, but I love pairing it with a simple cup of strong coffee or black tea to balance out the sweetness. It’s also fantastic with some vanilla ice cream or fresh berries for added freshness and extra indulgence.
Creative Ways to Present
When I bring this to a party or gift it, I like to cut the fudge into bite-sized squares and arrange them in decorative tins or jars lined with parchment. Wrapping small squares individually in wax paper makes sharing at work or school a breeze. For holidays, a sprinkle of edible glitter or colorful sprinkles adds a festive touch.
Make Ahead and Storage
Storing Leftovers
I store my Rocky Road fudge in an airtight container in the fridge, and it keeps beautifully for up to 10 days. Just make sure to separate layers with parchment paper to avoid sticky squares sticking together.
Freezing
Freezing fudge works surprisingly well! I usually cut it into squares first, then place them in a single layer on a baking sheet to freeze. Once hard, I transfer the squares into a ziplock bag. When you’re ready to enjoy, let them thaw at room temperature for about 15-20 minutes.
Reheating
Generally, fudge is best enjoyed cold or at room temperature. If you want to soften it slightly, pop a few squares in the microwave for just 5-7 seconds—but be careful not to melt it completely or you’ll lose that perfect chewy texture.
FAQs
-
Can I use milk chocolate chips instead of semi-sweet?
Absolutely! Milk chocolate will make the fudge sweeter and creamier. Just be mindful it may change the overall sweetness, and you might want to reduce any extra sweet additions accordingly.
-
Why do I need to freeze the marshmallows first?
Freezing the marshmallows helps them hold their shape when mixed with warm chocolate. Otherwise, they tend to melt too much and the fudge loses that delightful contrast of soft and gooey marshmallows.
-
Can I make this fudge without nuts?
Yes! If you prefer nut-free, simply omit the peanuts or swap them for seeds like pumpkin or sunflower seeds for a similar crunch without allergens.
-
Why is my fudge crumbly or grainy?
This usually happens if the chocolate burns or if you don’t stir enough while melting. Melt the chocolate mixture over medium heat gently and stir constantly to ensure smooth texture.
Final Thoughts
I can’t recommend this Rocky Road fudge recipe enough—it’s one of those feel-good, comfort-finger foods that make gatherings a little sweeter and quiet nights at home extra indulgent. It’s simple to make, fun to customize, and sure to impress anyone you share it with. Next time you want a sweet treat that feels homemade but looks like you slaved over it, give this fudge a shot. I promise your friends (and your sweet tooth) will thank you!
Print
Rocky Road Fudge Recipe
- Prep Time: 10 minutes
- Cook Time: 10 minutes
- Total Time: 2 hours 10 minutes
- Yield: 16 servings
- Category: Dessert
- Method: Stovetop
- Cuisine: American
Description
This Rocky Road Fudge recipe combines rich semi-sweet chocolate, creamy sweetened condensed milk, crunchy salted peanuts, and fluffy mini marshmallows to create a decadent no-bake treat. Perfect for parties or a sweet indulgence, this fudge is easy to prepare and chill to perfection.
Ingredients
Fudge Base
- 3 cups semi-sweet chocolate chips
- 14 ounce can sweetened condensed milk
- 4 tablespoons butter, cubed
- 1 teaspoon vanilla extract
Add-ins
- 3 cups mini marshmallows plus a few extra for the top
- 1 cup salted peanuts plus a few extra for the top
Instructions
- Prepare Pan: Line a 9×13 inch dish with foil and spray with nonstick spray to ensure easy removal of the fudge later.
- Melt Chocolate Mixture: In a medium saucepan over medium heat, combine the semi-sweet chocolate chips, sweetened condensed milk, and cubed butter. Stir constantly until the chocolate chips are fully melted and the mixture is smooth.
- Add Flavorings: Remove the saucepan from heat and stir in the vanilla extract and salted peanuts to evenly distribute the flavors and crunch.
- Prepare Marshmallows: Place the mini marshmallows in a large mixing bowl, ready to combine with the chocolate mixture.
- Combine Mixtures: Pour the warm chocolate and peanut mixture over the marshmallows. Mix gently to coat, taking care if you want the marshmallows to retain some shape—allow the chocolate to cool slightly before pouring if desired.
- Spread in Pan: Transfer the combined mixture into the prepared foil-lined dish, spreading it out evenly with a spatula.
- Top the Fudge: Sprinkle extra mini marshmallows and salted peanuts on top for added texture and visual appeal.
- Chill: Refrigerate the fudge for 2 to 3 hours or overnight until it is firm and set.
Notes
- Use only sweetened condensed milk for the best consistency, no substitutes.
- Freezing the marshmallows briefly before mixing helps prevent them from melting too much.
- Cold cubed butter aids in melting the chocolate evenly without scorching.
- Line the pan with foil for easy removal and clean edges.
- For clean slices, warm your knife under hot water, wipe dry, and then cut through the fudge.
- For a caramel twist, drizzle caramel sauce over the fudge before chilling, inspired by Turtle Fudge.
Nutrition
- Calories: 270 kcal
- Sugar: 28 g
- Sodium: 110 mg
- Fat: 15 g
- Saturated Fat: 8 g
- Unsaturated Fat: 6 g
- Trans Fat: 0 g
- Carbohydrates: 35 g
- Fiber: 1 g
- Protein: 5 g
- Cholesterol: 15 mg


