

If you adore festive treats that combine the refreshing zing of peppermint with rich chocolate and a delightful crunch, you’re in for a real treat.

Why You’ll Love This Recipe
- Quick & Simple Prep: Using a sugar cookie mix speeds up the process without sacrificing flavor or texture.
- Perfect Balance of Flavors: Peppermint and chocolate are a classic duo that feels both festive and indulgent.
- Customizable & Fun: The crushed candy cane topping adds a delightful crunch, and you can easily tweak the recipe to suit your taste.
- Great for Gifting: These cookies look charming and taste gourmet, making them perfect for holiday gift boxes or cookie swaps.
Ingredients & Why They Work
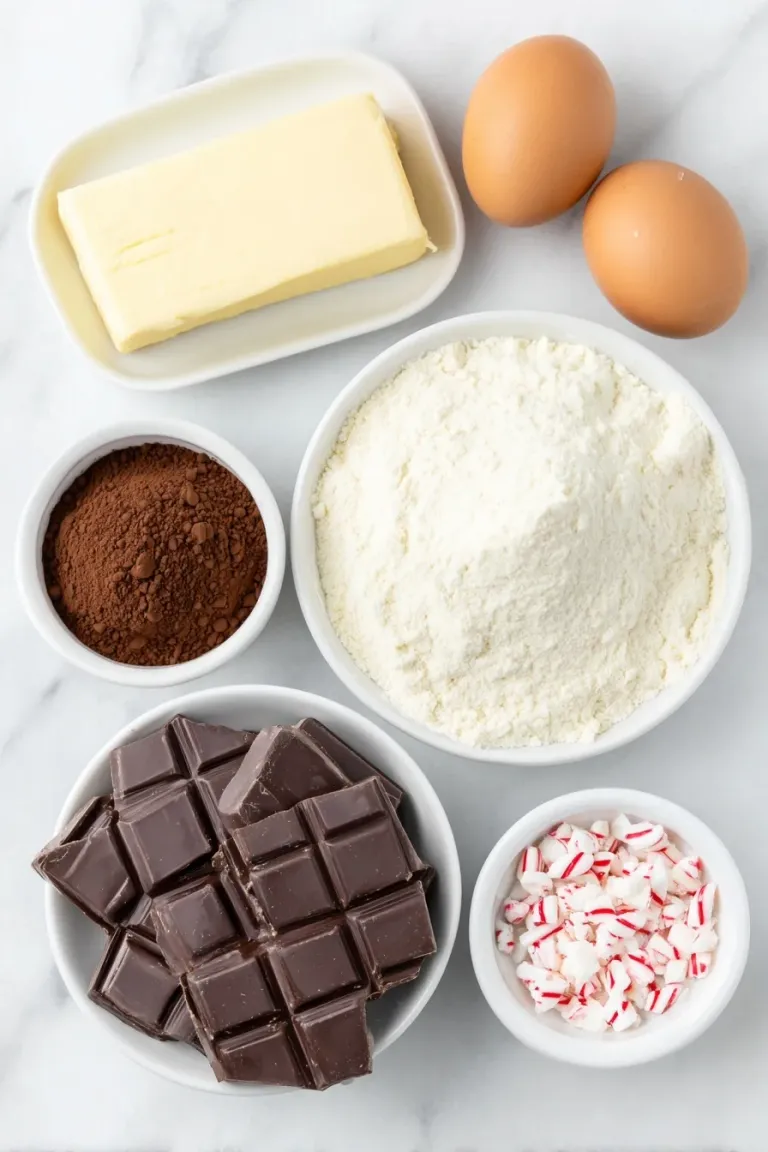
Let’s break down the magic behind the ingredients in this Peppermint Thumbprint Cookies with Chocolate Almond Recipe. Each one is carefully chosen to make your cookies tender, flavorful, and stunningly festive. Here’s why they matter and a few tips to get you everything you need.
 Save
- Sugar cookie mix: This premade mix keeps things easy while delivering a reliably soft, buttery base—your shortcut to cookie success.
- Salted butter: The fat that gives cookies richness and tenderness; salted adds just a touch of savory balance but feel free to use unsalted if you prefer control over salt.
- Cocoa powder: Adds beautiful chocolate flavor and dark color, crucial for the luscious almond bark contrast.
- Eggs: They bind the dough and contribute to a soft, chewy texture, making the cookies hearty but not dense.
- Peppermint extract: The star of the show! A little goes a long way in adding that crisp peppermint bite which pairs beautifully with chocolate.
- Chocolate almond bark: Melts perfectly to fill the cookie wells, setting shiny and smooth, plus the almond bits add a lovely texture.
- Crushed candy canes: Provide that festive crunch and pop of minty flavor—plus they dress up the top with holiday sparkle.
Make It Your Way
Play around with this Peppermint Thumbprint Cookies with Chocolate Almond Recipe to fit the mood. Switch up the peppermint extract for pure vanilla to tone it down, or use different nuts in the bark. You can easily make this recipe your own!
- Mini Cookie Version: Using slightly smaller dough balls makes mini cookies perfect for bite-sized snacking or party platters.
- Seasonal Toppings: Swap candy canes for chopped peppermint bark, crushed toffee, or even colored sugar sprinkles for customization.
Before You Start
- Take out early: Soften 1 stick of salted butter.
- Pan and oven: Line a sheet pan with parchment and heat the oven to 350°F.
- Crush the candy canes: Crush them to ¼ cup and chop the chocolate almond bark.
- Indent tool: A 1-teaspoon measure makes neat thumbprints; press again right after baking.
Step-by-Step: How to Make Peppermint Thumbprint Cookies with Chocolate Almond Recipe
 Save
Step 1: Mix the Magic
First, preheat your oven to 350°F—it sets the stage perfectly. Next, in a large bowl, combine your sugar cookie mix, softened salted butter, cocoa powder, eggs, and peppermint extract. It’s best to use an electric beater here to get a smooth, uniform dough. Scrape the sides as you go so no pockets of dry mix hide out. The dough will be rich and fudgy, and it’s going to smell incredible!
Step 2: Shape Perfect Dough Balls
Line a baking sheet with parchment paper to keep things hassle-free. Use a tablespoon or a cookie scoop to portion out 1-inch dough balls. Roll them gently between your palms to form smooth, even rounds. Place them spaced out on your pan — these cookies will expand slightly, so give them breathing room.
Step 3: Create Those Signature Thumbs
Now, here’s a fun part that really sets these cookies apart: press your thumb or a teaspoon into the center of each dough ball to create a little well. If you notice any cracking, don’t worry—simply press the dough back together gently. This thumbprint will cradle the melted chocolate later, so make it nice and prominent.
Step 4: Bake and Prep for Filling
Bake your cookies for 8-10 minutes until the centers begin to set but the cookies still feel soft. Right out of the oven, press your thumb or teaspoon into the centers again—sometimes the dough puffs up a bit during baking and this step helps keep those wells well-defined for the almond bark filling.
Step 5: Melt and Fill with Chocolate Almond Bark
While your cookies cool, chop the chocolate almond bark into small pieces for easy melting. Heat it in a microwave-safe bowl in 20-second bursts, stirring in between so it melts smoothly without burning. Then, spoon the melted chocolate carefully into the indentations on each cookie, filling them completely for that luscious finish.
Step 6: Sprinkle and Set
Quickly sprinkle crushed candy canes over the top of the melted chocolate before it sets to add festive color and fresh mint flavor.
Pro Tips for Making Peppermint Thumbprint Cookies with Chocolate Almond Recipe
- Precise Dough Balls: It helps to make your dough balls a little smaller than 1 inch because the cookies puff up in the oven — this keeps the thumbprints perfectly sized to hold the melted chocolate.
- Crushing Candy Canes: For quick and easy candy cane crushing, put them in a plastic bag and use a rolling pin. It creates nice chunky pieces rather than powdered sugar, which gives a better crunch.
- Chocolate Melting Technique: Melting bark in short bursts in the microwave with frequent stirring prevents overheating and keeps the chocolate glossy and smooth for the best final look.
- Preventing Cracks: If your thumbprint cracks when pressing, gently mold the edges back together with your fingers — it won’t affect the cookie, it just keeps them looking nice!
How to Serve Peppermint Thumbprint Cookies with Chocolate Almond Recipe
 Save
Garnishes
Add a little extra crushed peppermint on top just before serving for that extra burst of holiday cheer. Dust the plate with a bit of powdered sugar for a snowy effect that wows guests at cookie swaps.
Side Dishes
These cookies pair wonderfully with a hot cup of cocoa or freshly brewed coffee. During celebrations, set out a holiday punch or eggnog alongside for that perfect seasonal spread.
Creative Ways to Present
For parties, arrange them on a festive platter and tuck sprigs of pine or holly around the cookies for a beautiful holiday display. You can also package them individually in cellophane bags tied with red and green ribbons — a lovely homemade gift anyone would cherish.
Make Ahead and Storage
Storing Leftovers
If you have leftovers (and with these cookies, never do!), store them in an airtight container at room temperature for 2-3 days — they stay pleasantly soft and fresh. If you want them to keep longer, refrigeration works well and keeps them good for 4-5 days.
Freezing
You can freeze these cookies after they’re completely cooled in an airtight container for up to 3 months. When you’re ready to enjoy, just let them thaw at room temperature — they come back tasting just as fresh and fabulous.
Reheating
To revive the slightly melty chocolate and warm the cookie, pop one or two in the microwave for about 10 seconds. It’s that simple and makes you feel like you’re biting into a freshly baked cookie again.