
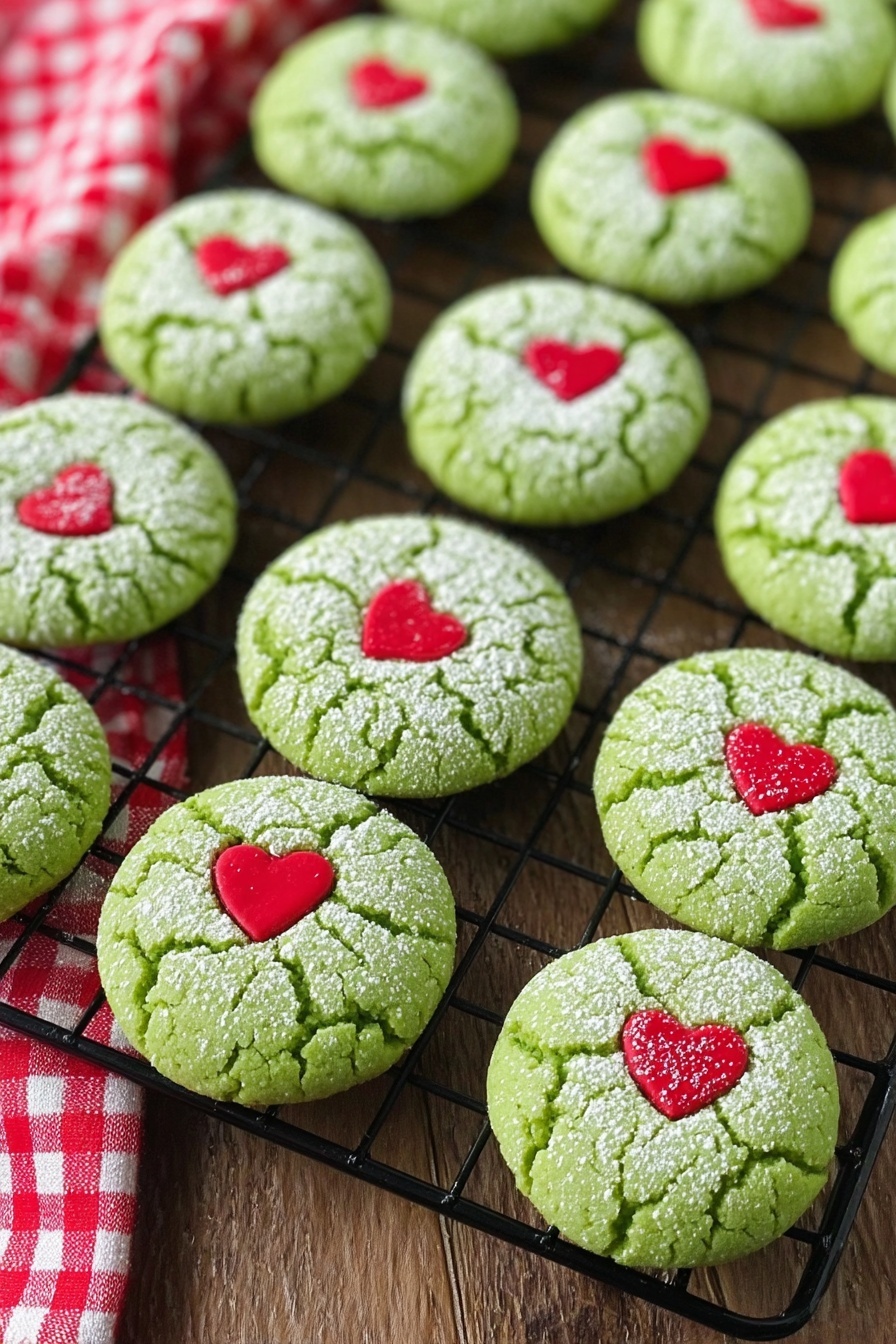
If you’re looking for a festive, fun, and downright delicious way to brighten up the holidays, my Grinch Cake Mix Cookies Recipe is exactly what you need. These green, soft, and tender cookies bring a splash of holiday magic to your kitchen, and the best part? They’re super easy to make — perfect for baking with friends, family, or even just treating yourself. Stick with me, and I’ll walk you through how to make these charming little bites of joy that everyone will love.
Why You’ll Love This Recipe
- Effortless to Make: Using a cake mix as your base means less measuring and fuss.
- Festive and Fun: The bright green color combined with candy hearts instantly sets a cheerful holiday vibe.
- Soft, Chewy Texture: These cookies come out perfectly tender every time — no dry edges in sight.
- Customizable: You can easily switch up toppings or add your own twist to suit your style.
Ingredients & Why They Work
Each ingredient in this Grinch Cake Mix Cookies Recipe plays a part in creating the soft texture and vibrant look we all adore. I chose vanilla cake mix for its mild, sweet base that complements the festive green food coloring perfectly. Plus, it’s the secret behind that irresistible tender crumb.
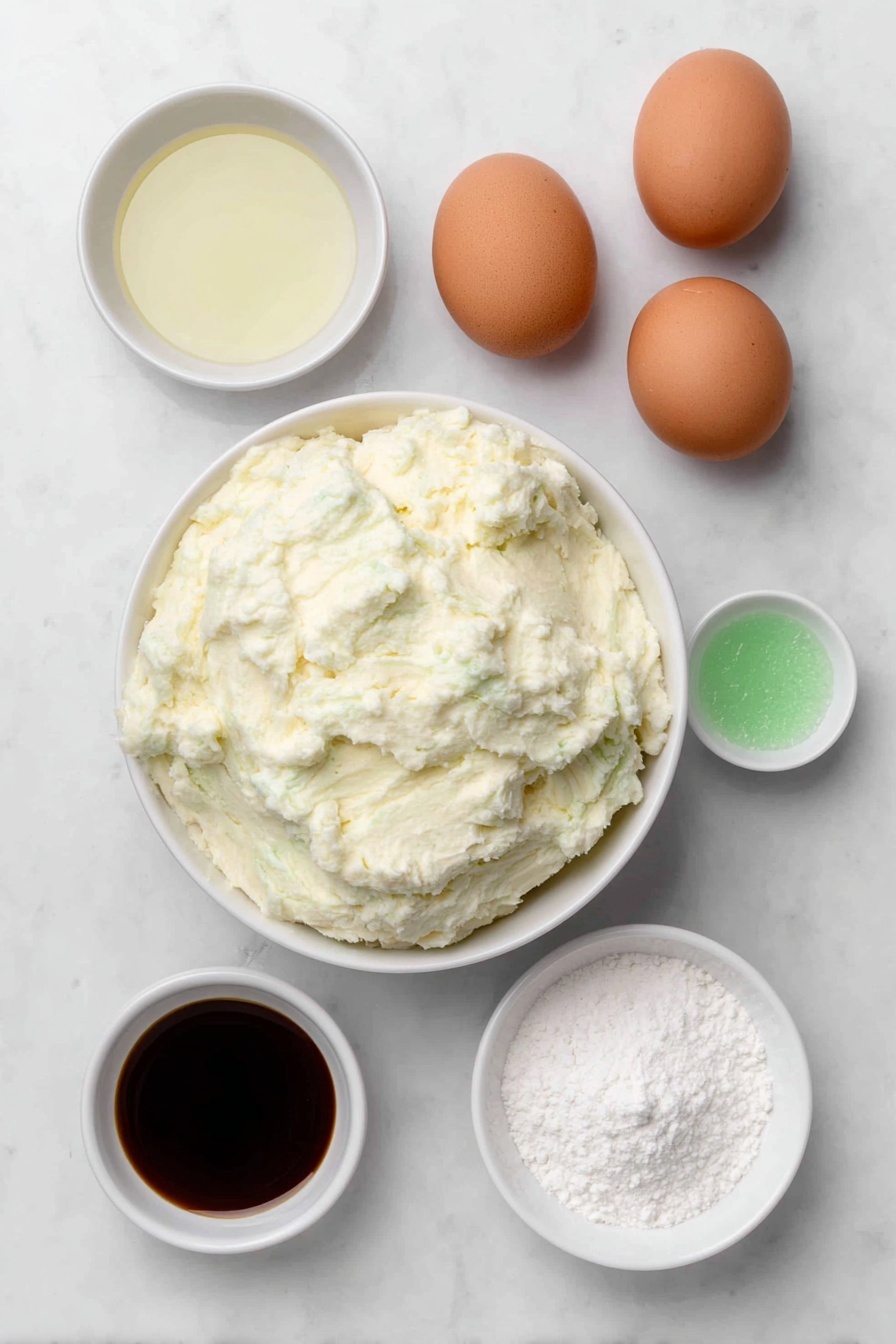
- Vanilla cake mix: The foundation of these cookies — it adds sweetness and moisture, so there’s no need for flour or baking powder.
- Vegetable oil: Keeps the cookies soft and rich without weighing them down.
- Eggs: Bind everything together and add extra moisture for that tender bite.
- Vanilla extract: Enhances the cake mix flavor, making these cookies taste extra homemade.
- Green food coloring (gel kind): Gel works best for vivid color without making the dough too wet.
- Confectioners sugar and cornstarch: This combo coats the outside, giving the cookies a slightly crisp, delicate finish while keeping them soft inside.
- Candy hearts or sprinkles: These add personality and a festive touch that makes the cookies truly pop.
Make It Your Way
One of my favorite things about this Grinch Cake Mix Cookies Recipe is how easy it is to personalize. I’ve played around with toppings and colors over time, and it’s such a blast to make these cookies uniquely yours — perfect for gift boxes or holiday parties.
- Variation: I sometimes swap candy hearts for red or white sprinkles to make a more subtle holiday look, and trust me, each variation is just as yummy.
- Dietary modifications: If you want to make these gluten-free, look for a gluten-free vanilla cake mix — I’ve tried it and it works great!
- Flavor twists: A drop of peppermint extract can turn these into a minty holiday treat that tastes like Christmas in every bite.
Step-by-Step: How I Make Grinch Cake Mix Cookies Recipe
Step 1: Mix Up The Magic Dough
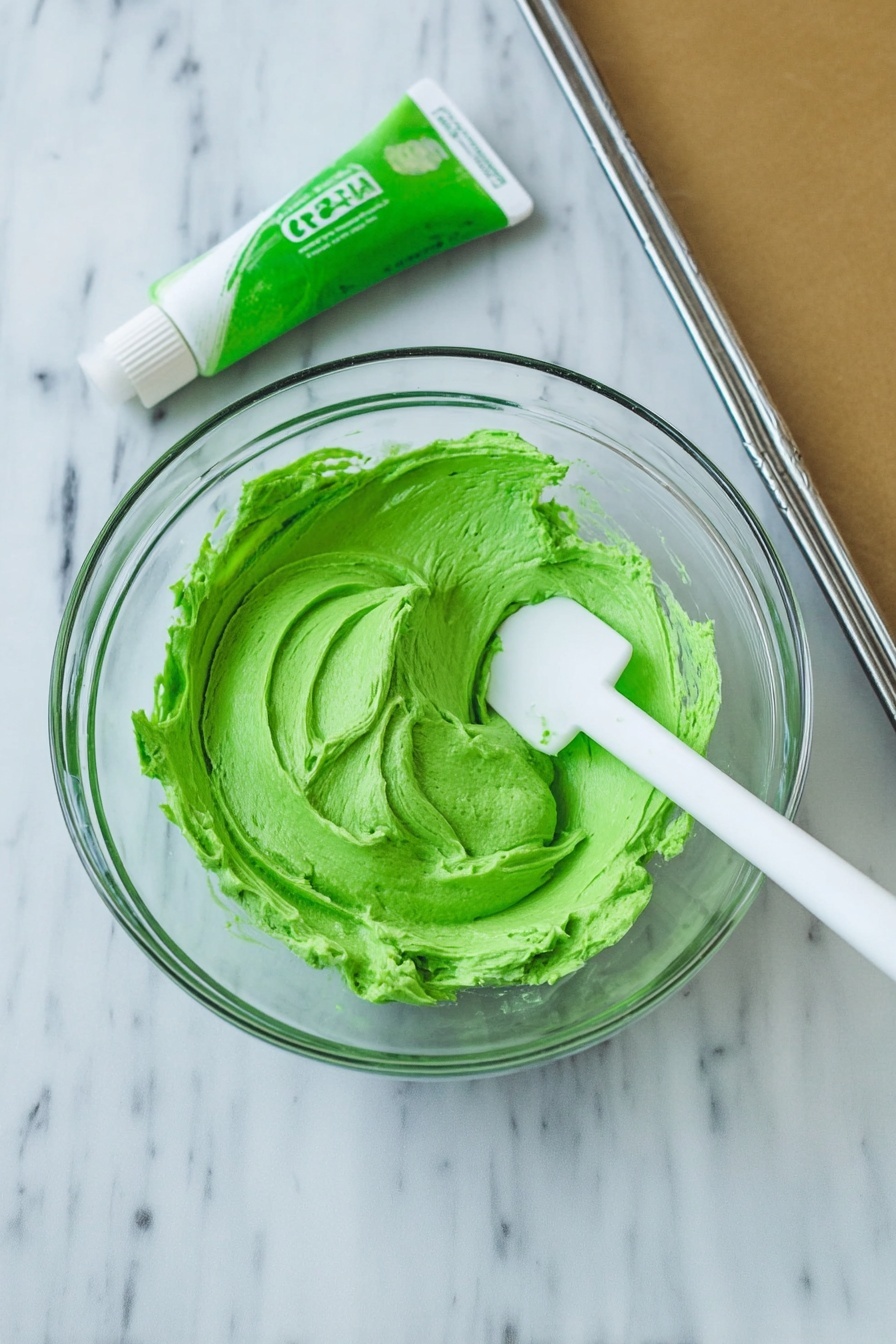
First things first — line your baking sheet with parchment paper. This little prep move saves so much cleanup later. Next, grab a large bowl and combine your vanilla cake mix, vegetable oil, eggs, and vanilla. Then, add in that bright green gel food coloring and stir well until the dough is evenly tinted. It’s so fun to watch the dough turn into that perfect Grinch green. Pro tip: gel food coloring works wonders because it colors beautifully without making the dough watery.
Step 2: Chill Out (Dough, That Is)
This is a crucial step—pop that dough in the fridge for 20 minutes. Don’t skip it! The chill time firms up the dough, making it easier to scoop and handle, and it really helps the flavors meld together so your cookies taste better. I used to rush this part, but now I know patience pays off with the best results.
Step 3: Prep Your Sugar Coating
While the dough chills, preheat your oven to 350°F and mix the confectioners sugar with the cornstarch in a small bowl. This magical coating gives the cookies a sweet, slightly crunchy shell that contrasts nicely with their soft centers. I love this step because it also adds a snowy look to the cookie surface—so festive!
Step 4: Shape and Coat Those Cookies
Once your dough is chilled, scoop it into balls using a cookie scoop or spoon — I can’t recommend a scoop enough, it makes them uniform and so much easier to handle. Roll each ball in the powdered sugar-cornstarch mix until completely coated. Place them on your prepared baking sheet, spacing them a couple of inches apart.
Step 5: Give Them a Gentle Press & Decorate
Lightly press each ball with the bottom of a glass to flatten the tops slightly, creating a perfect base for those cute candy hearts or sprinkles. Be gentle here — if you press too hard, the cookies lose their lovely puffy texture. Then, press a candy heart on top of each cookie for that iconic holiday pop.
Step 6: Bake to Perfection
Bake your cookies for 8-10 minutes — I found 9 minutes hits the sweet spot every time. Watch them closely because overbaking dries them out fast. You want them just set but still soft in the center. Once out of the oven, let the cookies rest on the baking sheet for 3 minutes before moving them to a wire rack to cool completely.
Pro Tips for Making Grinch Cake Mix Cookies Recipe
- Use a Cookie Scoop: It makes scooping dough fast, consistent, and mess-free—I always keep one handy.
- Don’t Skip Chilling: It really firms the dough and prevents cookie spreading, which you don’t want when you want that perfect Grinch shape.
- Gentle Pressing: Use light pressure when flattening so the cookies stay soft and fluffy, not dense.
- Watch the Oven Closely: Cake mix cookies bake quickly, so set a timer and take them out as soon as they’re set to avoid drying out.
How to Serve Grinch Cake Mix Cookies Recipe
Garnishes
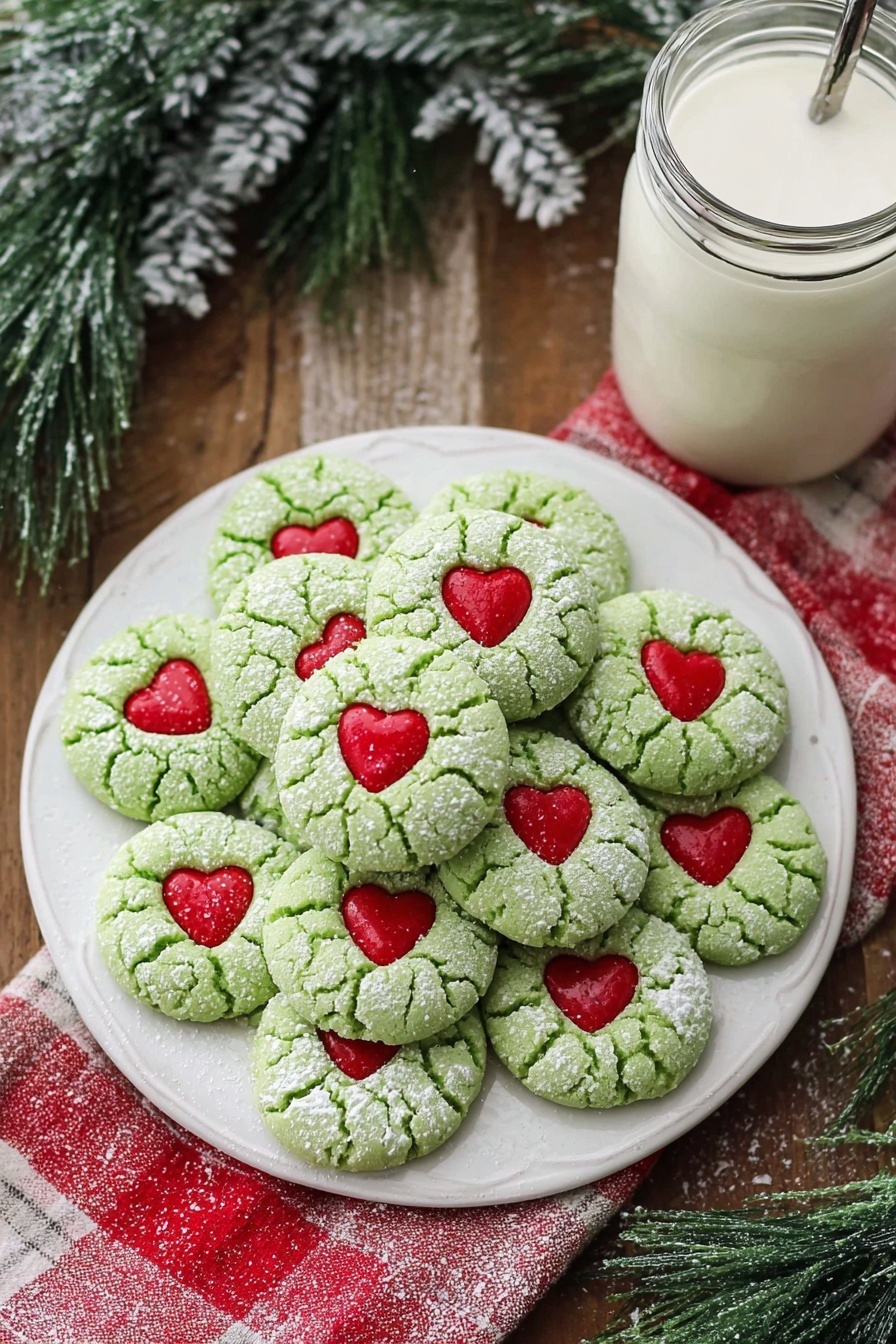
I love topping these cookies with candy hearts because they add a sweet message and cute color, but red, white, or silver sprinkles work beautifully too. Sometimes I dust a tiny extra sprinkle of powdered sugar for a frosty effect that guests adore. Whatever you choose, garnishes add that extra festive cheer!
Side Dishes
Serve your Grinch Cake Mix Cookies alongside a warm cup of hot cocoa or a mug of peppermint tea — these combos really bring out their sweetness and add cozy vibes to your snack time. They’re also great paired with a simple vanilla ice cream if you’re feeling indulgent.
Creative Ways to Present
For holiday parties, I like to arrange these cookies on a festive platter with green and red napkins, or stack them in pretty mason jars tied with ribbon for gifts. Another crowd-pleaser? Presenting them on a cookie board alongside other colorful treats for an eye-catching holiday spread.
Make Ahead and Storage
Storing Leftovers
Once your Grinch Cake Mix Cookies have cooled completely, I store them at room temperature in an airtight container. They stay fresh and soft for about 5 to 7 days—sometimes longer if my family doesn’t devour them first!
Freezing
These cookies freeze well, which is a huge bonus during busy holiday seasons. Just place cooled cookies in a freezer-safe bag or container. I freeze them for up to 2-3 months and thaw at room temperature when ready. They maintain their softness, so you don’t sacrifice any yum.
Reheating
If you want your cookies warm and fresh, pop them in the microwave for about 10 seconds or heat them in a low oven for a few minutes. This brings back that just-baked softness and accentuates the flavors — like you just pulled them from the oven again.
FAQs
-
Can I use a different color food coloring for this recipe?
Absolutely! The green is perfect for that Grinch holiday look, but you can switch to red, blue, or any color you like. Just use gel food coloring to avoid changing the dough’s consistency.
-
What if I don’t have cornstarch for the coating?
Cornstarch helps create a delicate crisp coating when mixed with confectioners sugar, but if you don’t have any, you can just use confectioners sugar alone. The texture might be slightly different but still delicious.
-
Can I make these cookies vegan?
This recipe isn’t vegan as written because it contains eggs and some premade cake mixes may have dairy or eggs. However, you can try using a vegan cake mix and egg substitutes like flax eggs — I’d recommend experimenting with small batches if you want to perfect your version.
-
How do I prevent my cookies from spreading too much?
Chilling the dough for at least 20 minutes before baking is key—it firms the dough and helps keep that signature thick, puffy shape that makes these Grinch Cake Mix Cookies so special.
Final Thoughts
These Grinch Cake Mix Cookies have become a holiday favorite in my kitchen — not just because they’re easy, but because of how much joy they bring at any party or cozy night in. Whether you bake them with kids, give them as gifts, or just enjoy eating them warm by yourself (I won’t judge!), they’re guaranteed to put a smile on your face. I hope you give this recipe a try and find as much fun in making and sharing them as I do!
Print
Grinch Cake Mix Cookies Recipe
- Prep Time: 35 minutes
- Cook Time: 10 minutes
- Total Time: 45 minutes
- Yield: 28 servings
- Category: Dessert
- Method: Baking
- Cuisine: American
- Diet: Vegetarian
Description
These Grinch Cake Mix Cookies are festive, easy-to-make treats that combine a vanilla cake mix base with bright green gel food coloring for a fun holiday twist. Soft and chewy with a sweet coating of confectioners sugar and cornstarch, they’re topped with candy hearts or sprinkles for a charming finish.
Ingredients
Cookie Dough
- 1 box vanilla cake mix (Betty Crocker recommended)
- ⅓ cup vegetable oil
- 2 eggs
- ½ teaspoon vanilla extract
- Green food coloring (gel kind)
Coating
- ⅓ cup confectioners sugar
- ⅓ cup cornstarch
Toppings
- Candy hearts or sprinkles
Instructions
- Prepare baking sheet. Line a baking sheet with parchment paper and set aside to prevent sticking.
- Mix dough. In a large bowl, combine the vanilla cake mix, vegetable oil, eggs, and vanilla extract. Add green gel food coloring and mix thoroughly to evenly distribute the color throughout the dough.
- Chill dough. Refrigerate the dough for 20 minutes to make it easier to handle and allow flavors to meld.
- Preheat oven and prepare coating. Preheat oven to 350 degrees Fahrenheit. In a small bowl, mix together the confectioners sugar and cornstarch to create the coating.
- Form and coat cookies. Remove dough from refrigerator. Scoop dough into balls using a cookie scoop or spoon, then roll each ball thoroughly in the confectioners sugar and cornstarch mixture until fully coated.
- Arrange and flatten dough balls. Place coated dough balls onto the prepared baking sheet. Lightly press each ball with the bottom of a glass to flatten slightly, being careful not to press too hard.
- Add toppings. Place a candy heart or sprinkle on top of each dough ball for decoration.
- Bake cookies. Bake in the preheated oven for 9 minutes (do not exceed 10 minutes to avoid overbaking).
- Cool the cookies. Let cookies rest on the baking sheet for 3 minutes after baking, then transfer them to a wire rack to cool completely.
- Serve and enjoy. Enjoy the cookies warm or at room temperature for best flavor and texture.
Notes
- Use a cookie scoop for uniform cookie size and easier handling of dough.
- Do not skip chilling the dough; it improves texture and flavor blending.
- Do not overbake; 9 minutes is ideal to keep cookies soft and moist.
- Store cookies in an airtight container at room temperature for 5-7 days.
- Freeze completely cooled baked cookies in a freezer bag for up to 3 months. Thaw completely before eating.
Nutrition
- Calories: 140 kcal
- Sugar: 14g
- Sodium: 100mg
- Fat: 5g
- Saturated Fat: 1g
- Unsaturated Fat: 4g
- Trans Fat: 0g
- Carbohydrates: 22g
- Fiber: 0g
- Protein: 2g
- Cholesterol: 25mg


